
How to Iron a Shirt: The Ultimate Step-by-Step Guide
Knowing the best way to iron a shirt isn’t just a handy skill — it’s essential for any adult looking to make a positive impression. In this post, we’ll look at everything you need to know about ironing your shirt well, including some ironing tips for shirts that’ll give your formal dinner shirts or mens casual shirts that clean, crisp, and sophisticated look.
Preparing Your Shirt for Ironing
It’s better to iron a shirt when it’s still slightly damp since it’ll make it easier to get out all the creases. So don’t leave your shirt in the dryer for too long — take it out just before it’s dry, work your ironing magic, then hang it up somewhere to fully dry. If you’re ironing your shirt after months of it hanging in your closet, then mist-spray it with some water before getting to work.
From there, simply load it onto your ironing board, and follow the step-by-step guide for ironing shirts below.
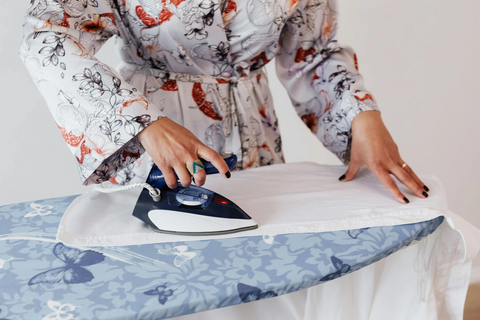
Step-by-Step Guide to Ironing a Shirt
1. Start with the collar
First up, take your men’s shirt and unbutton the collar if it has them. You’ll want to unfold the collar and lay it flat on the ironing board. Iron each ‘side’ of the collar evenly. The collar tends to be made of thicker material, so you may need to use more force. You can leave the collar unbuttoned until you’ve finished ironing the whole shirt.
2. Move on to the cuffs
If your shirt cuffs have buttons, like our Peaky Blinders shirt, then take them out before starting. It’s important not to iron directly over the buttons, as there’s a chance they’ll melt into your shape. For the best results, it’s recommended to iron the cuffs of a shirt on both the inside and outside. As with the collar, apply more pressure than normal if the cuff material is thicker.
3. Iron the sleeves
Lay the shirt sleeves long ways along the ironing board, one at a time. Use your fingers to flatten and position the sleeve. Start at the top of the sleeve, near the armpit, and work your way down.
Top Tip: If you struggle with ironing sleeves on a regular ironing board, you can always buy a special sleeve board prop, which you attach to your normal board.
4. Iron the front and back panels
The front and back panels are the easiest parts to iron. The only difficult areas are around the shoulders and the buttons. Be sure to manoeuvre in between the buttons from a side angle; you’ll run the risk of melting and causing other damage if you go over them!
You’ll have no trouble with the main chunks of material on the front and back. You might have trouble with the shoulder areas. Before applying the iron, flatten these areas as much as you can with your hand. Be mindful not to create additional creases on the opposing side that you’re ironing.
5. Final touch-ups and inspection
Looking at the shirt under a bright light will reveal any missed creases. If you spot any, just simply go over it again. Once it’s done, promptly hang it up with the buttons done up.
Ironing Tips for Different Shirt Fabrics
Different shirt fabrics need different ironing approaches. Here’s the skinny on what settings work well for different types of material.
- Cotton Shirts: High heat, high steam.
- Linen Shirts: Iron while damp.
- Silk Shirts: Low heat. Place a cloth between the shirt and the iron.
- Polyester Shirts: Low-medium heat will prevent damage.
Ironing Shirts Without an Ironing Board
No ironing board? No (major) problem! Any hard surface will do the job. You can use your dining table in a pinch, though remember to place a towel in between the shirt and the surface. While this approach will work, keep in mind that results will be less impressive than if you were using an ironing board. If you really need to make a positive impression, then seek out a board elsewhere.
How to Iron a Shirt Quickly
Need to quickly iron a shirt before running out of the front door? Focus on the most visible parts of the shirt. If you’re wearing a blazer, that’ll mean the collar, cuffs, and shirt front. You can leave the back and arm areas if you’re not planning to take your jacket off. The higher steam and heat settings will produce faster results.
Maintaining Your Shirts Between Washes
Carefully place your well-ironed shirt in your wardrobe, ideally with no contact with other items of clothing. You can use fabric sprays to spot-clean any minor issues, and it’ll also help to prevent creasing, too.
Conclusion:
Ironing makes your shirt look sleek, sharp, and presentable. While it can be difficult at first, it’s worthwhile practising and refining your ironing skills, ensuring you can always have that polished, well-put-together look.